
DIY Henna Ink: Mastering the Art of Temporary Body Art

Henna, a plant-based dye that has been used for centuries to create beautiful temporary body art, has a rich history and a timeless allure. Originating in ancient cultures of North Africa, the Middle East, and South Asia, henna body art is a captivating form of self-expression that has made its way into contemporary fashion and culture. In this blog, we'll explore the art of DIY henna ink, providing you with the knowledge and inspiration to create your own stunning henna designs.
Disclosure: As an Amazon Associate, I earn from qualifying purchases. Some of the links in this post are affiliate links, meaning, at no additional cost to you, I will earn a commission if you click through and make a purchase.
The Magic of Henna
The History of Henna
Henna, a time-honored tradition that spans millennia, traces its origins back to ancient Egypt and India, where its significance transcends mere adornment. This natural dye, extracted from the leaves of the henna plant, has played a pivotal role in cultural celebrations, sacred rituals, and personal beautification practices.
In ancient times, henna held a sacred place in various cultural ceremonies and rites of passage. It was applied with reverence during weddings, births, and other pivotal life events. This deep red-brown pigment wasn't merely for aesthetics; it was believed to carry blessings and protective qualities, serving as a potent symbol of good fortune. Henna adorned the bodies of brides and grooms, symbolizing love, happiness, and the promise of a harmonious union.
Henna's significance extended beyond matrimony. It was an integral part of festivals and religious celebrations, representing purity and spirituality. Many believed that the application of henna on hands and feet could ward off evil spirits, making it a vital protective talisman for wearers.
The intricate patterns and designs, often referred to as mehndi, showcased an array of symbols and motifs, each holding its own meaning. These patterns told stories, celebrated cultural heritage, and served as a form of self-expression. They were passed down through generations, preserving cultural identities and traditions.
Throughout history, henna transcended borders and cultures, becoming a global phenomenon. Its enduring appeal and versatility have allowed it to evolve from a traditional practice to a popular form of body art, appreciated by people worldwide. Today, henna's legacy lives on as a symbol of beauty, creativity, and cultural richness, reminding us of the profound connection between the past and the present.

The Versatility of Henna
Henna body art can be as simple or intricate as you desire. From delicate finger designs to intricate full-arm patterns, henna offers a wide range of possibilities for self-expression. It's perfect for various occasions, from weddings and festivals to personal adornment.
DIY Henna Ink Basics
Ingredients for DIY Henna Ink
The primary ingredient for henna ink is, of course, henna powder. You'll also need:
- Lemon juice or another acidic liquid to release the dye.
- Sugar or honey to help the paste adhere to the skin.
- Essential oils like eucalyptus, lavender, or tea tree for fragrance and to enhance color.
- A mixing bowl and spoon.
- Plastic wrap or a plastic squeeze bottle for application.
- Design templates or your creative inspiration.
Making Your Own Henna Paste
Step-by-Step Guide
1. Mixing the Henna Powder: Start by sifting the henna powder into a bowl to remove any clumps. Gradually add lemon juice (or another acidic liquid) and mix until you achieve a toothpaste-like consistency. Cover the bowl and let it sit for several hours or overnight to allow the dye to release.
2. Adding Sugar or Honey: Once the dye has released, add a small amount of sugar or honey to the henna paste. This helps the paste adhere to the skin and prolongs the staining process.
3. Incorporating Essential Oils: To enhance the color and add a pleasant fragrance, mix in a few drops of your chosen essential oil(s).
4. Straining the Paste: Before applying the henna, strain the paste through a fine-mesh strainer or a nylon stocking to remove any leftover henna particles and achieve a smoother consistency.
Creating Your Henna Art
Application Tips
- Cleanse the skin thoroughly before applying henna to ensure it's free from oils or lotions that may hinder the staining process.
- Use a plastic squeeze bottle or a henna cone to apply the paste with precision.
- Allow the henna design to dry on your skin for several hours or overnight. The longer it's left on, the darker the stain will be.
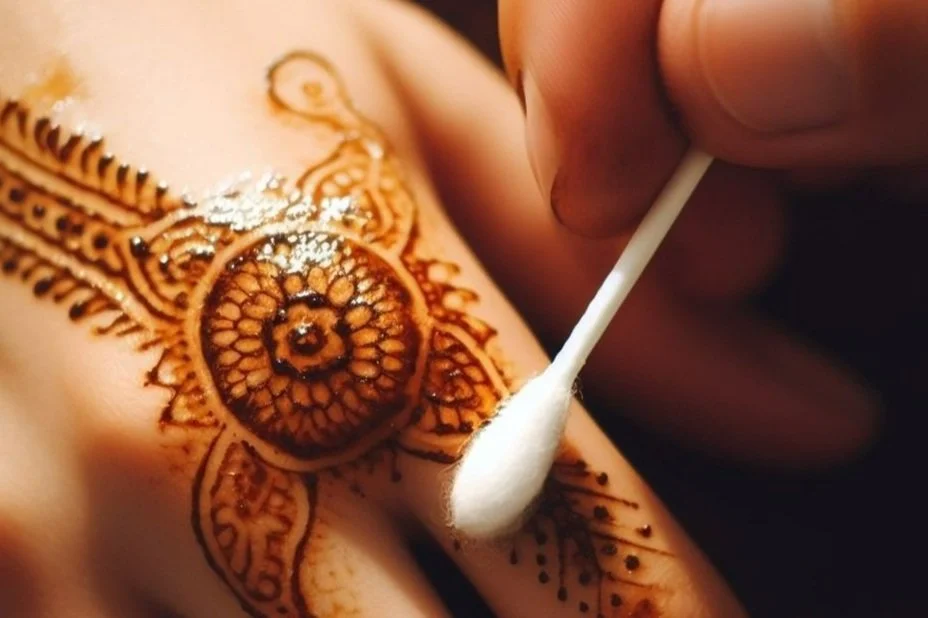
- After the paste has dried, gently scrape it off without using water. Avoid contact with water for at least 12 hours to allow the stain to fully develop.

Caring for Your Henna Design
- Henna stains typically last one to three weeks, depending on the quality of the henna paste and how well you care for your design.
- To prolong the stain, avoid exposing it to excessive moisture and rubbing.
- Applying a natural oil, such as coconut or olive oil, can help keep the skin moisturized and protect the henna design.
The Art of Henna Design
Design Inspiration
Henna designs can range from traditional geometric patterns to intricate floral motifs and contemporary artistic creations. Draw inspiration from henna design books, online resources, or create your own unique designs.
Practicing Your Skills
Henna application is an art that improves with practice. Consider practicing on paper or on a henna practice sheet to refine your technique before applying intricate designs on your skin.
Conclusion
Henna body art is not just a form of temporary decoration; it's a celebration of culture, creativity, and individuality. Whether you're adorning yourself for a special occasion or simply expressing your artistic flair, DIY henna ink offers a unique and captivating way to connect with a timeless tradition.
So, gather your henna ingredients, let your creativity flow, and embark on a journey into the mesmerizing world of henna body art. With patience, practice, and a little artistic inspiration, you can master the art of henna and create stunning designs that leave a lasting impression, both on your skin and in your heart.
Happy Inking,
Laurie & Bex