
Exploring the Art of Bookbinding: Unraveling Coptic Bookbinding

Books have been the vessels of knowledge, creativity, and storytelling for centuries. Beyond their content, the craft of bookbinding plays a vital role in preserving and presenting these treasures. While modern printing and binding methods are efficient, there's something enchanting about the art of hand-binding books. In this month, we'll take you on a journey through different styles of bookbinding, including the ancient Coptic and elegant Japanese techniques.
The Coptic Stitch: An Ancient Marvel
The Coptic binding method is one of the oldest known bookbinding techniques, dating back to the 2nd century AD in Egypt. Its durability and flexibility have made it a popular choice for artists, historians, and book enthusiasts. Here's a brief overview of the Coptic stitch:
Materials You'll Need:
- Sheets of paper for the pages
- Cardstock or leather for the covers
- Needle and waxed thread
- Awl or piercing tool
- Ruler and bone folder
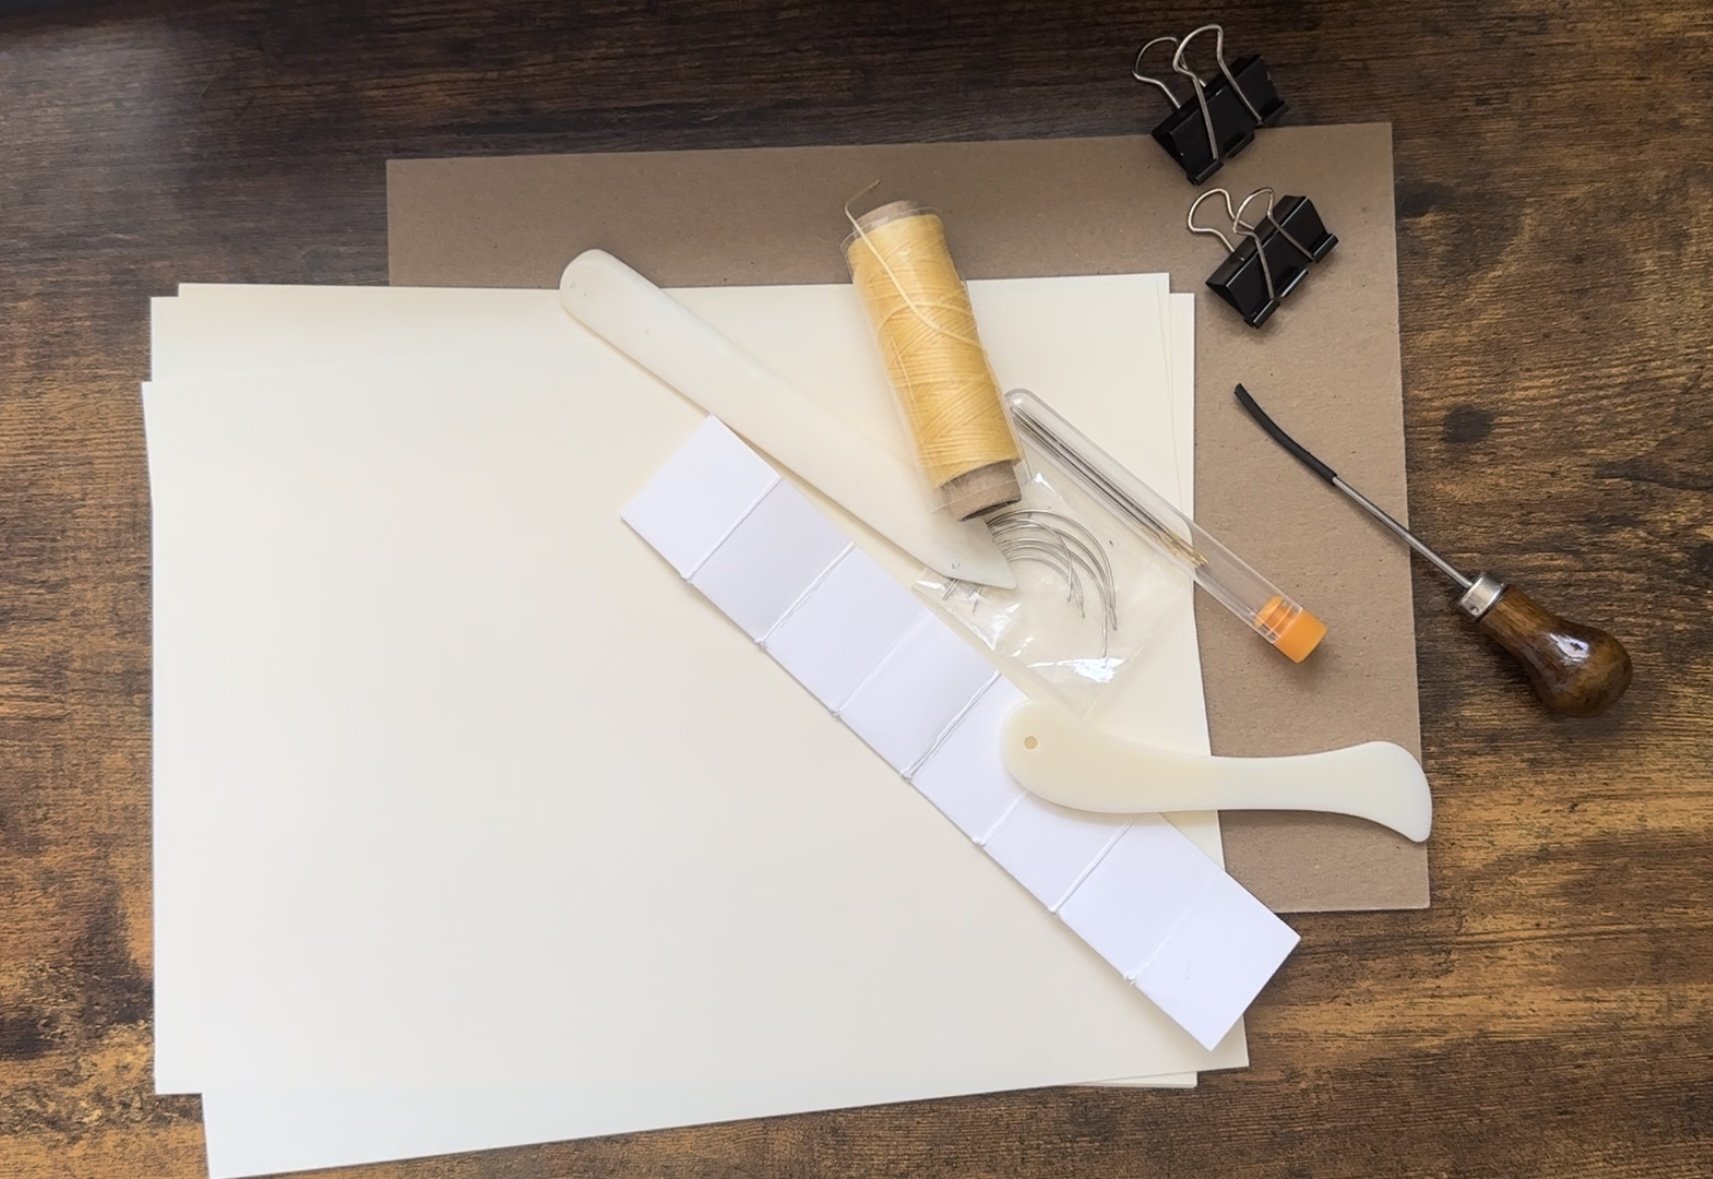
Materials I used to make the book. Items are linked below.
Disclosure: Some of the links in this post are affiliate links, meaning, at no additional cost to you, I will earn a commission if you click through and make a purchase.
Steps to Create a Coptic-Bound Book:
1. Prepare Your Pages: Stack and fold your sheets of paper in half to create "folios" (two-page sections).

Fold 8 1/2” x 11” pages in half.

Group 4 pages together to make a signature.
2. Punch Holes: Use an awl or piercing tool to create evenly spaced holes along the folded edge of each folio. These holes should align with each other.
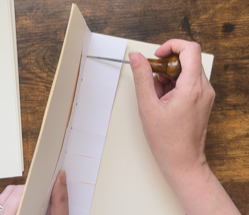
Use a guide to create evenly space for the holes.

Punch holes for the front and back covers. I did 1” in but you can do 1/2” in. Keep the vertical spacing same as the signatures.
3. Create Covers: Attach your covers to the sewn folios using the same Coptic stitch. This will bind the covers to the pages.
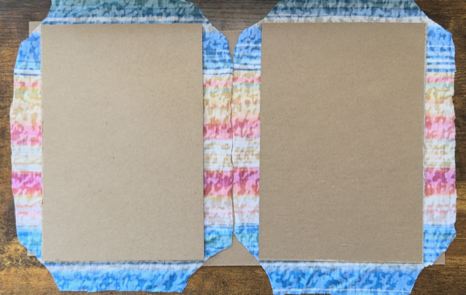
Cut chipboards 1/8” wider than the pages. Chipboard height will be the same as the pages. Book cover cut 1” border around the chipboard. Miter the corners by cutting across
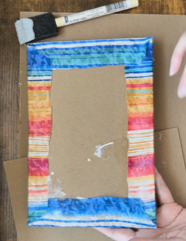
Use glue to press down the cover. Glue I used is linked above.
Glue a cardboard paper with 1/8” smaller than the cover on all sides.
4. Sew the Sections: Thread a needle with waxed thread and begin sewing the folios together. Start from the outside of the first folio, pass the needle through all the holes, and then return to the outside. Repeat this process for all folios.
Dotted red line is the thread inside the signatures.
Solid red line is the thread seen from the outside.
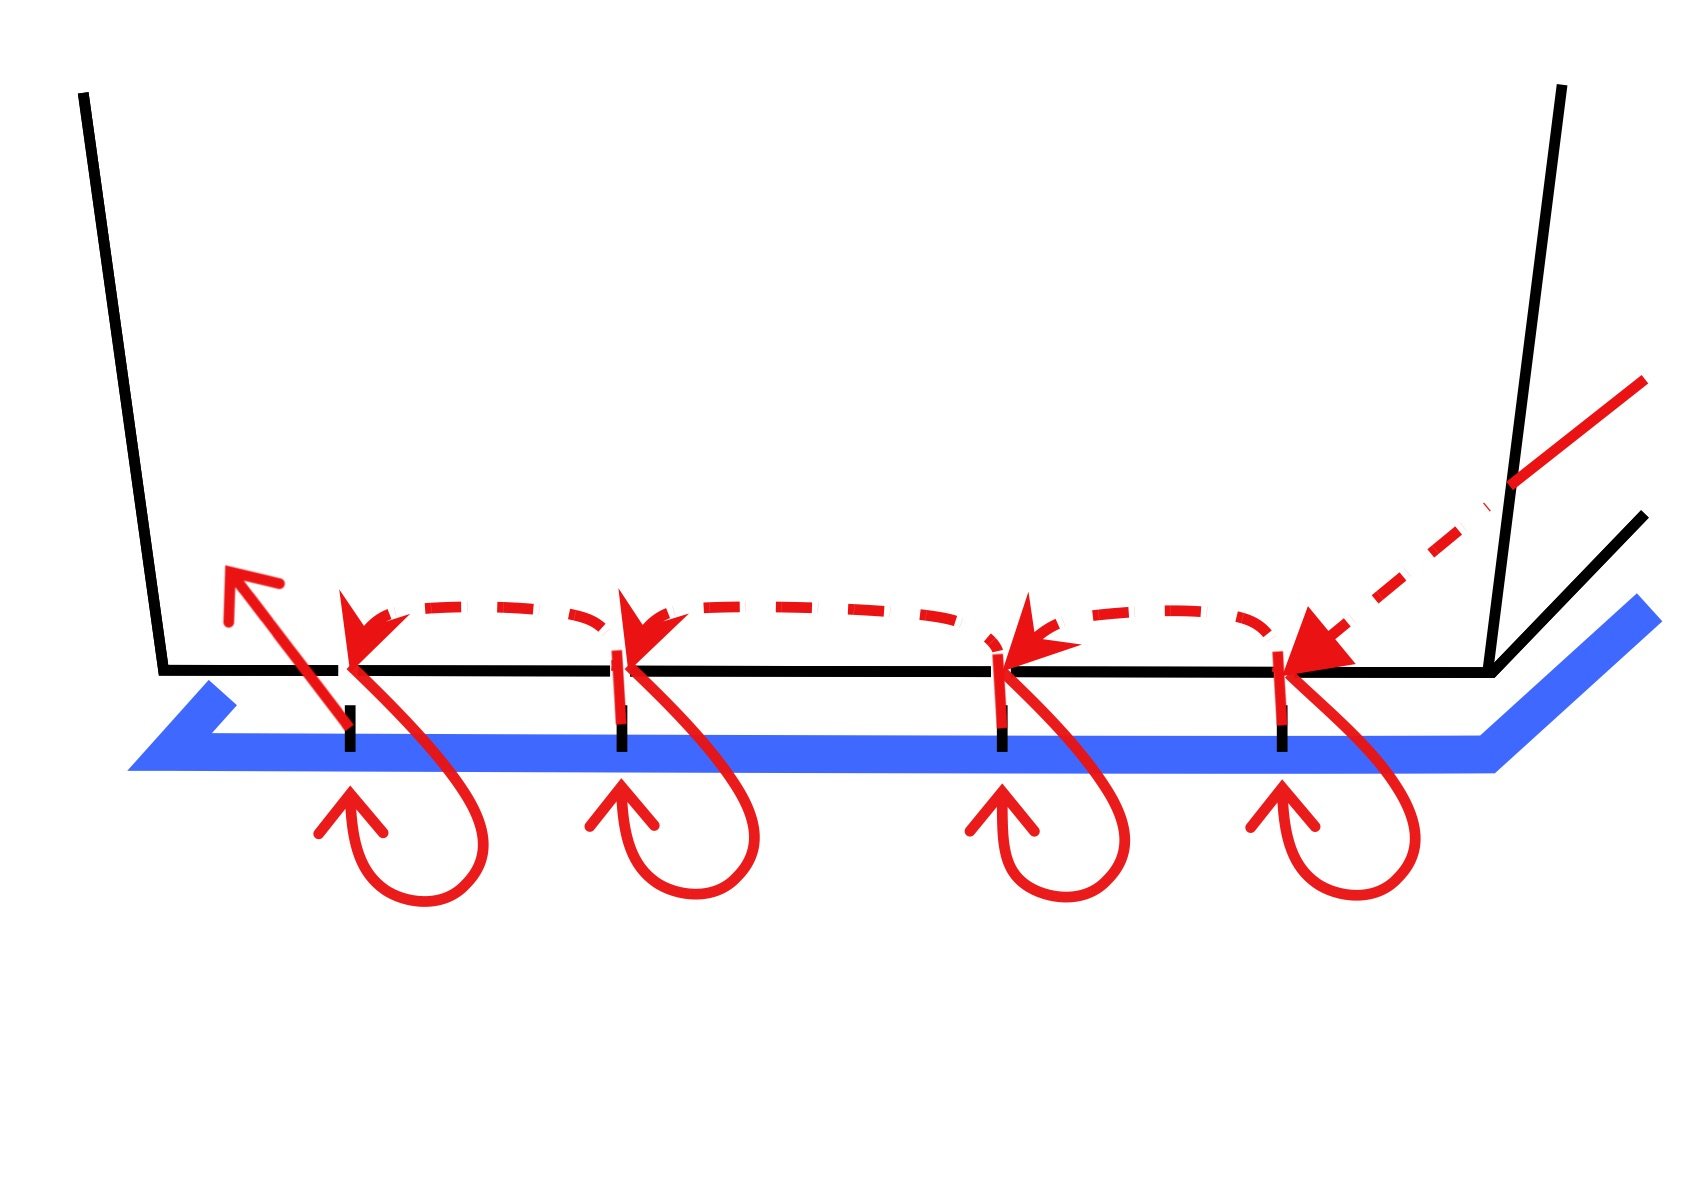
1. Start with the back cover and the last signature. You will sew them together. Knot the end of the thread

2. Sew the signatures together. Going up with one signature
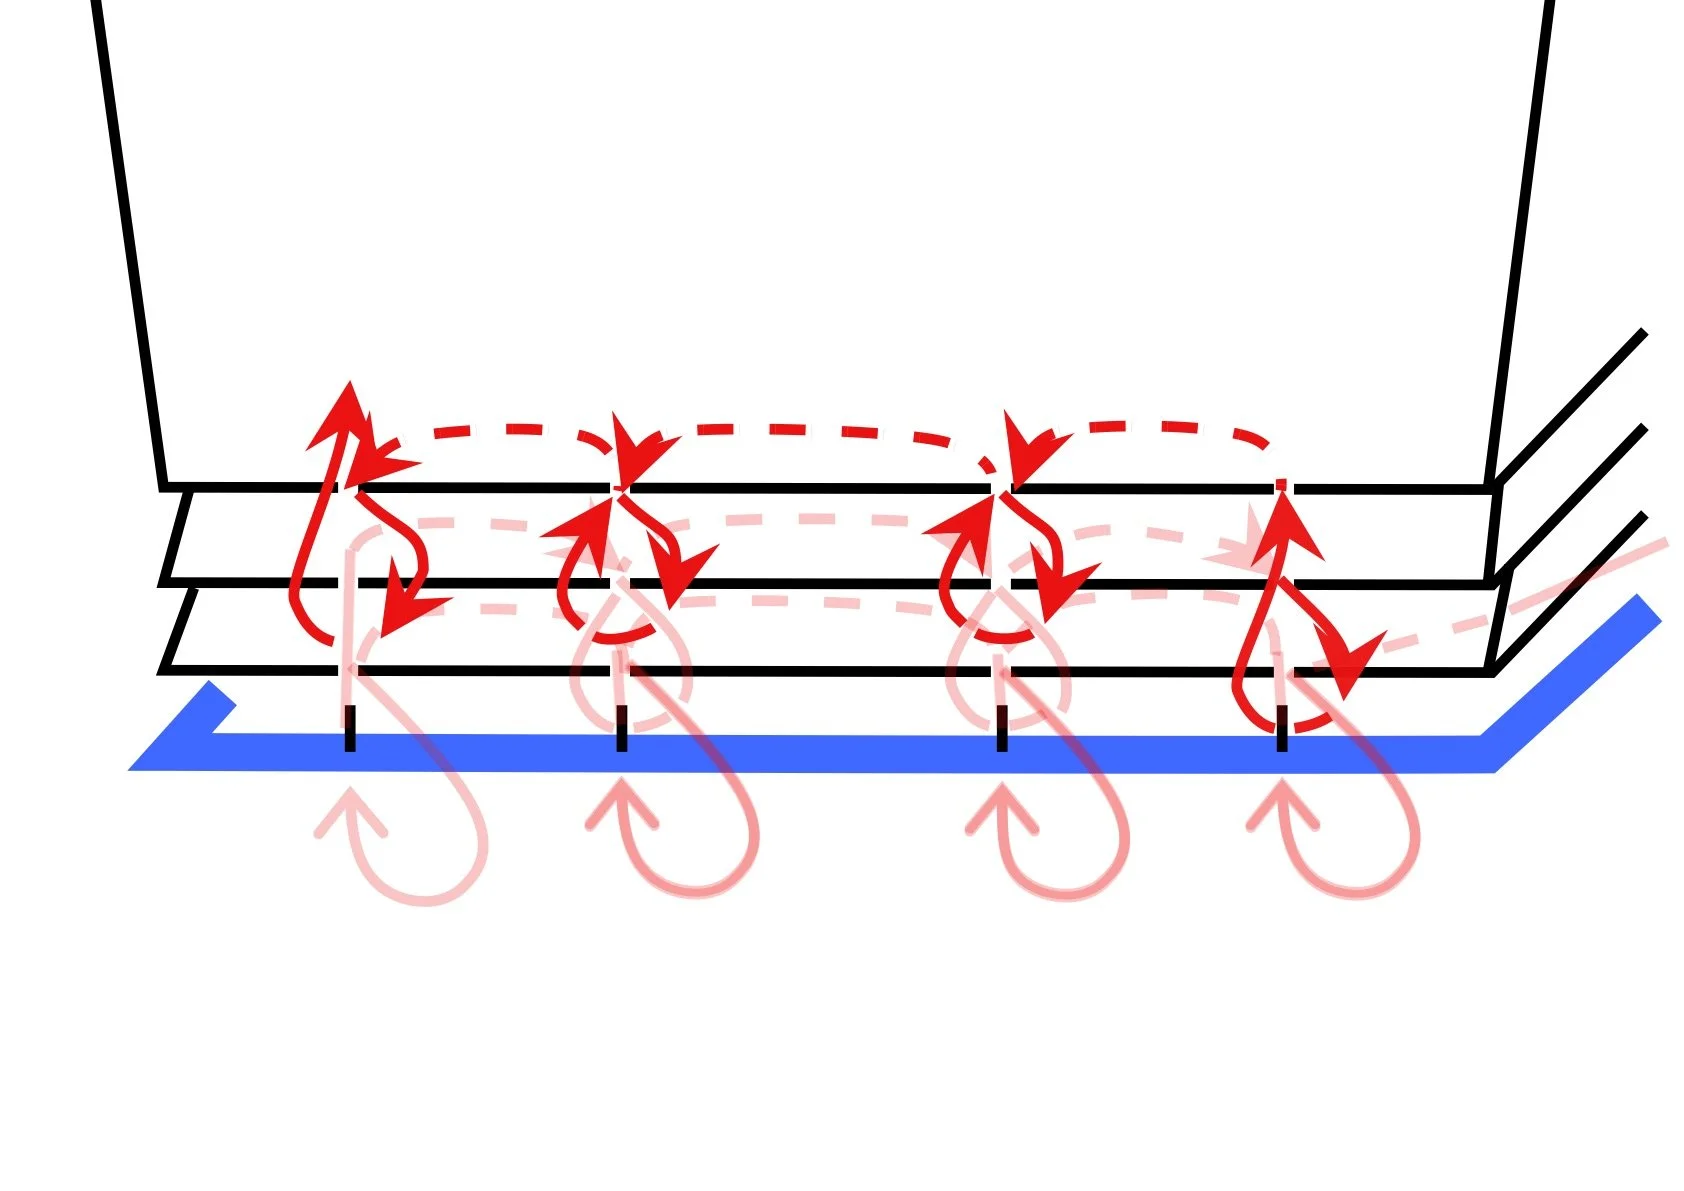
3. Continue sewing the signatures.
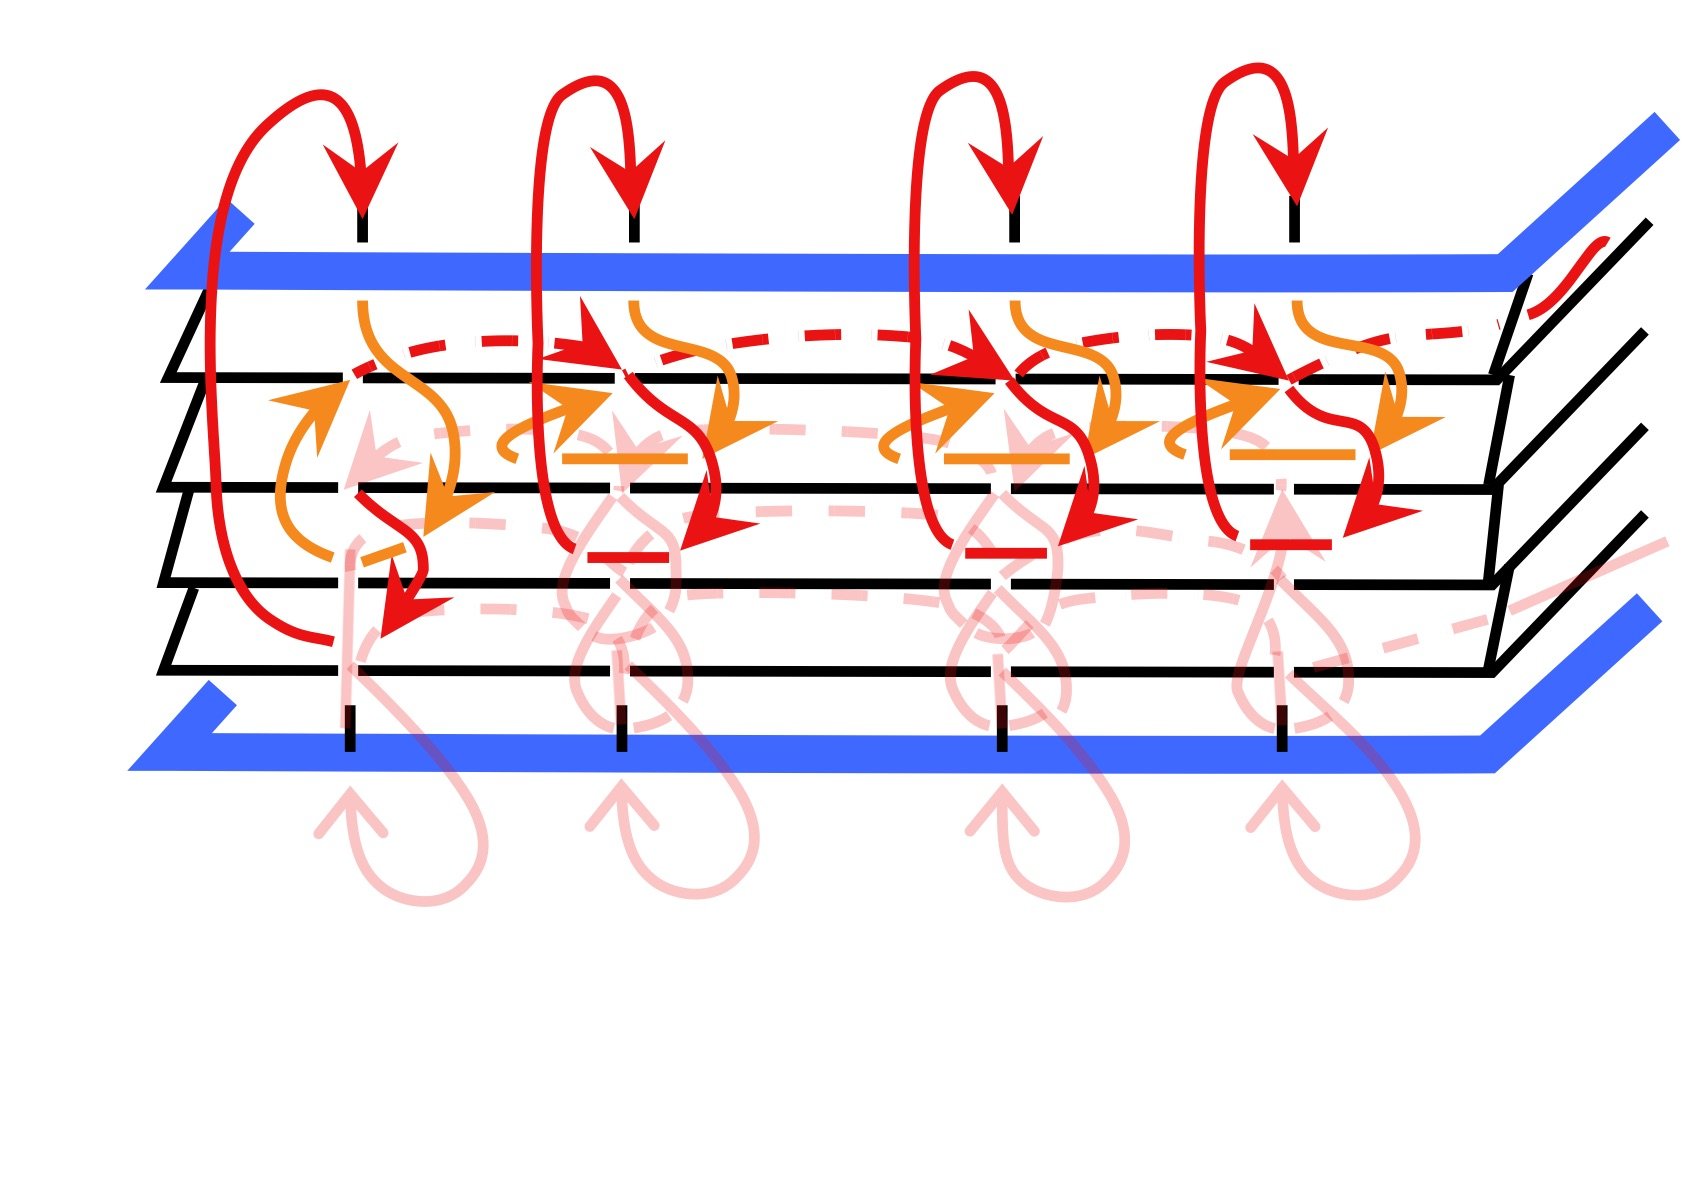
4.Sew the last signature and the top cover together. Red is the first part of each of the stitches going left to right in this diagram. Knot the thread at the end inside the signature.
5. Finish and Embellish: Trim any excess thread, and your Coptic-bound book is ready to use or embellish as desired.

Front cover

Coptiic Stitch spine

An inside page
Happy binding!
Laurie & Bex